 Getting Started
Mom: You can visit Mom in Fashionsta Village in Aurelia, or easily locate her by using the
Warper: via Special Areas > Home.
Shorty Note: After accepting Shorty, use theHelp Me Shorty (opens in a new tab) item from your consumables tab to summon him for help.

This guide introduces Mom's "Wake up from a Dream" tutorial, alongside Shorty, a helpful in-game guide who assists beginners up to level 71 with advice, important NPC warps, and 40-minute buffs.
After Mom and Shorty get you moving, open the Adventure Guide whenever you need help choosing level-appropriate monsters, quests, dungeons, equipment, or travel routes.
 Waking up from a Dream
Tutorial Overview
The "Wake up from a Dream" tutorial introduces movement, NPC interaction, equipment, hotkeys, combat, stats, skills, training weapons, Shorty, and the Job Master portal. Follow Mom's guidance through 14 steps to learn the basics of Age of Ymir.
 Starting the Tutorial
- Step 1. Create a Character: After clicking Play, select Wake up from a Dream to start the tutorial.

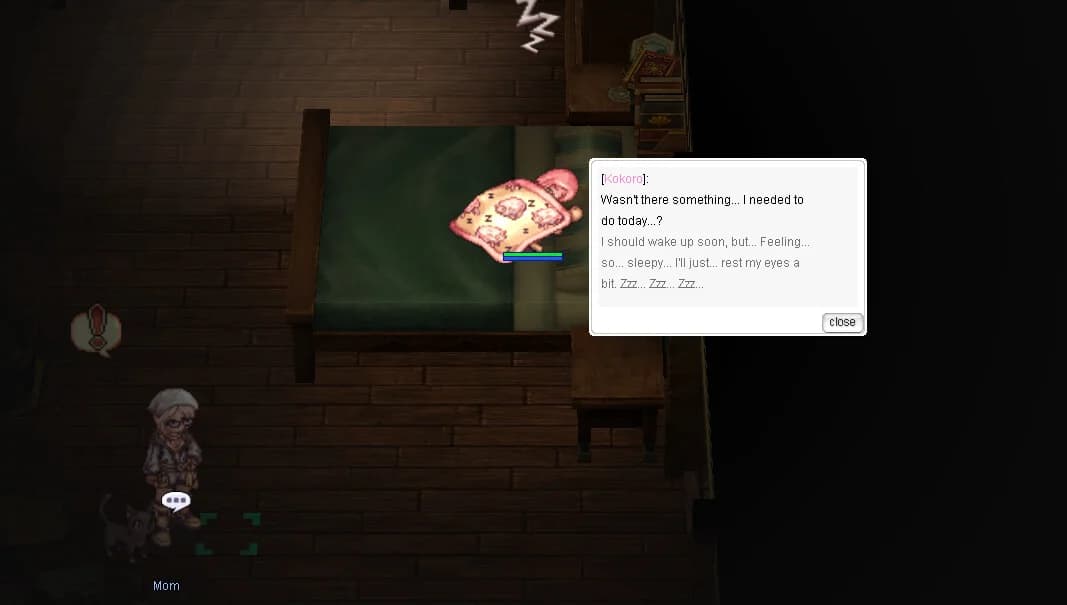
- Step 2. Talk to Mom: You'll wake up late for your adventurer journey. Mom asks you to gather essentials before heading out.
- You were supposed to be up one hour ago to become an adventurer but, unfortunately, you overslept.
- The world will now introduce you about how to move your character in the game.
- Click somewhere with the left-click of your mouse to move the character.
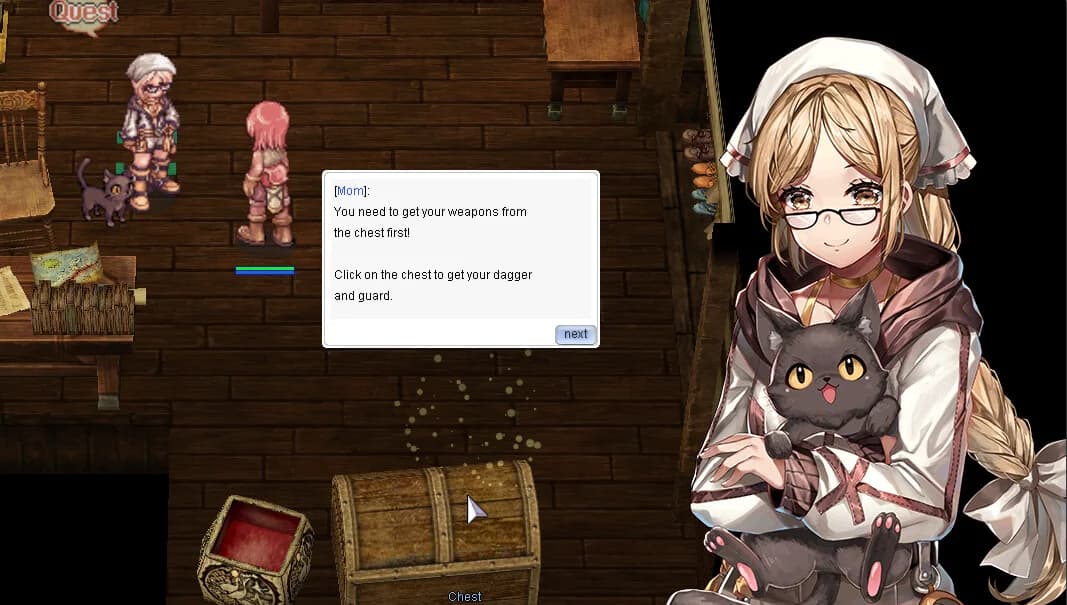
- Step 3. Treasure Chest: You will see a treasure chest located beside Mom, click on it to retrieve
your trustyTrusty Dagger (opens in a new tab) and
Novice Guard (opens in a new tab).
- Walk towards where Mom is. She will ask you to hurry up and get your things from the chest.
- The world will now introduce you to NPCs. As an example, click at the chest NPC to gather your trusty dagger!
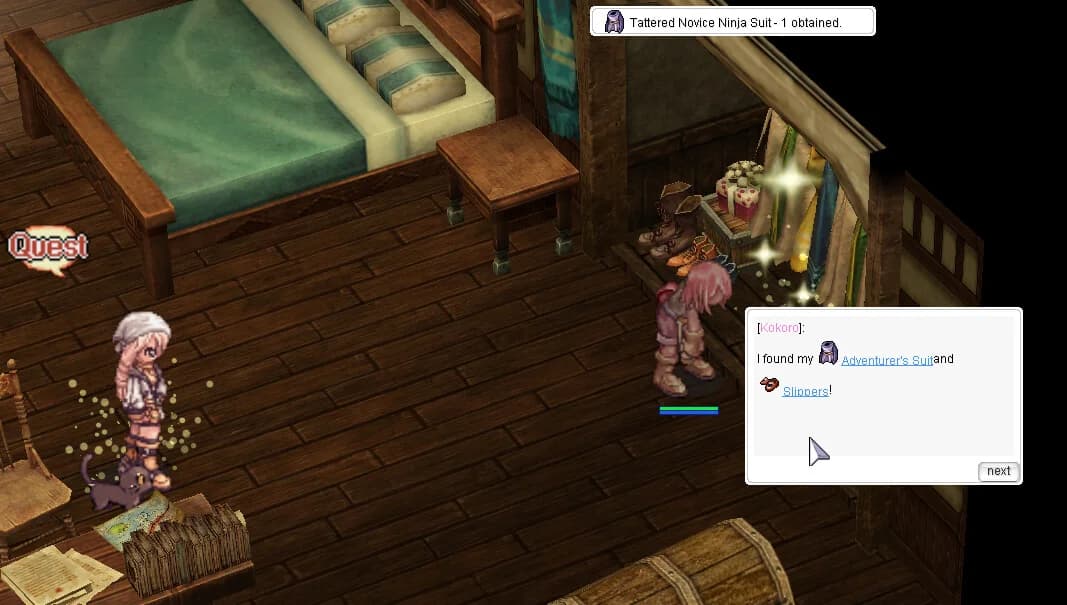
- Step 4. Equipment Closet: Click on the closet to retrieve your
Novice Eggshell (opens in a new tab),
Adventurer's Suit (opens in a new tab),
Novice Slippers (opens in a new tab),
Novice Somber Hood (opens in a new tab) and two
Novice Figures (opens in a new tab).
- After retreiving your dagger, Mom will tell you to not forget the rest of your equipment from the closet.
- The world will now you introduce you to camera rotation and zooming in and out.
- Hold down your right-click and move your mouse to rotate.
- To zoom in use the scroll of your mouse.
- Rotate the camera until you see the closet on your right. Click where you see a balloon saying Closet.
- The world will now introduce you to How to equip/unequip gear.
- Open your inventory by pressing ALT+E.
- Click on the Equipments tab (E).
- Double-click on
- You can also check the properties of it, or any other item, by right-clicking it.
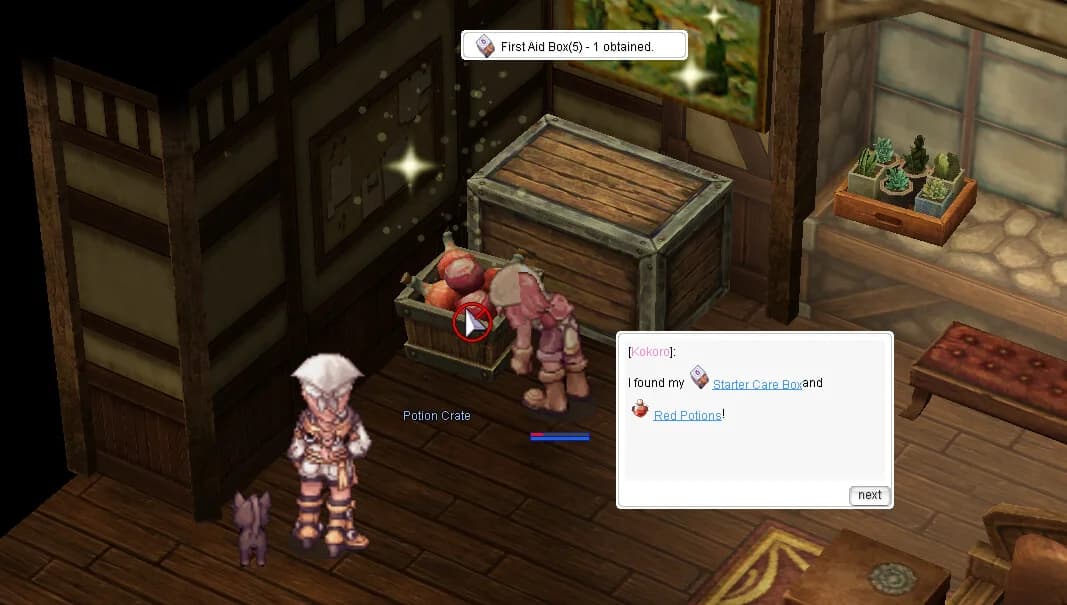
- Step 5. Follow Mom to the Potions Crate: Mom will now ask you to equip your dagger, guard, suit, slippers, and hood. After doing so, she will remind you to gather supplies. Follow her and click on the potions crate to obtain
Red Potions (opens in a new tab) x100 and the
Starter Care Box (opens in a new tab).
- After reaching the potions crate, you will receive Red Potions and a Starter Care Box.
- The world will now teach you about how to add/bind items, skills, or any other equipment to the hotkeys.
- You can do this by dragging and dropping any usable skills, equippable equipment, or usable consumable to the 4 rows of hotkeys visible on your screen.
- If for some reason you don't have them, press F12 on your keyboard to display one or more rows of hotkeys.
- If you just have one visible, more presses of F12 add up to 3 rows of hotkeys. A fifth press will make them all disappear.
- There is an extra line of 4 rows of hotkeys that can be swapped to when needed by pressing ALT+F.
- You can also change the shortcuts by pressing ESC -> BM/Shortcut Settings at any time.
- You can now try to bind the potions to F1, the top left slot of your first hotkey bar.
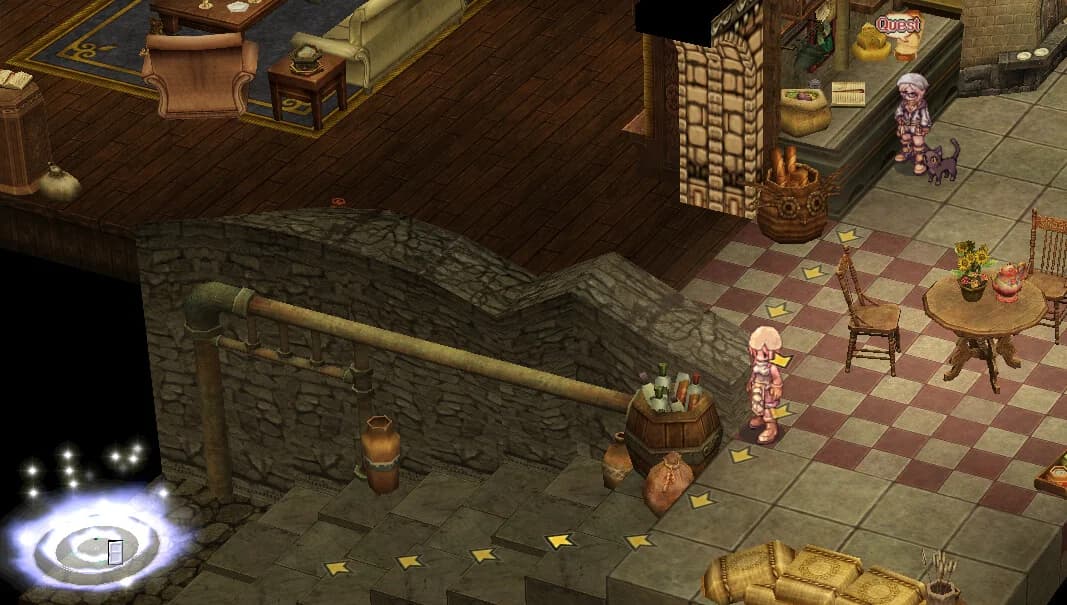
- Step 6. Find Mom in the Kitchen: Mom will now wait for you downstairs. After leaving the room, you will see displayed a bunch of arrows on the ground. Mom is at the kitchen and since the house may look big for a new player, you need to know where to go.
- Step 7. Talk to Mom in the Kitchen: After finding Mom, talk to her. She will tell you that you can't rely on her to wake you up every morning. She will also tell you that the basement is a mess and needs to be taken care. She would send Piper but he already had his meal.
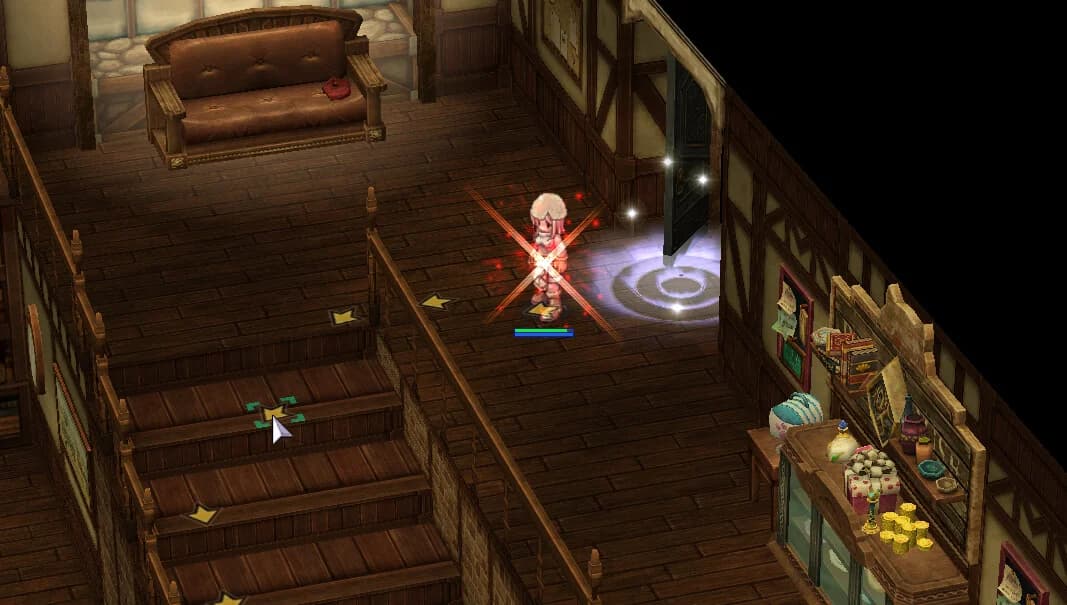
- Follow the arrows and go to the basement. You will now learn about combat.
- To enter combat simply left click on an enemy to begin hitting it with your weapon.
- You can use /nc to toggle auto-attack on and off.
- Step 8. Head downstairs to the Basement: Follow the arrows and go to the basement. You will now learn about combat.
- After killing a monster, you will level up. The world will now teach you about stat points.
- Stat points are points that increase the potential of your character. You can read more about them here.
- You can add stat points by opening the Status Window (ALT+A), or click at the icon that appeared at the bottom right of your screen, and click on the arrow next to your stats to increase them.
- Continue killing monsters.
- The world will now introduce you to the @arealoot command.
- As you can see, killing monsters make them drop items. Since it's an hassle to grab them all the time, you can use a command called @arealoot to pick them for you. They will be sent directly into your inventory.
- You can type @arealoot in your chat bar to turn it on and off.
- If you're curious about other commands that the server has to offer, type @commands in the chat and check what more there is available.

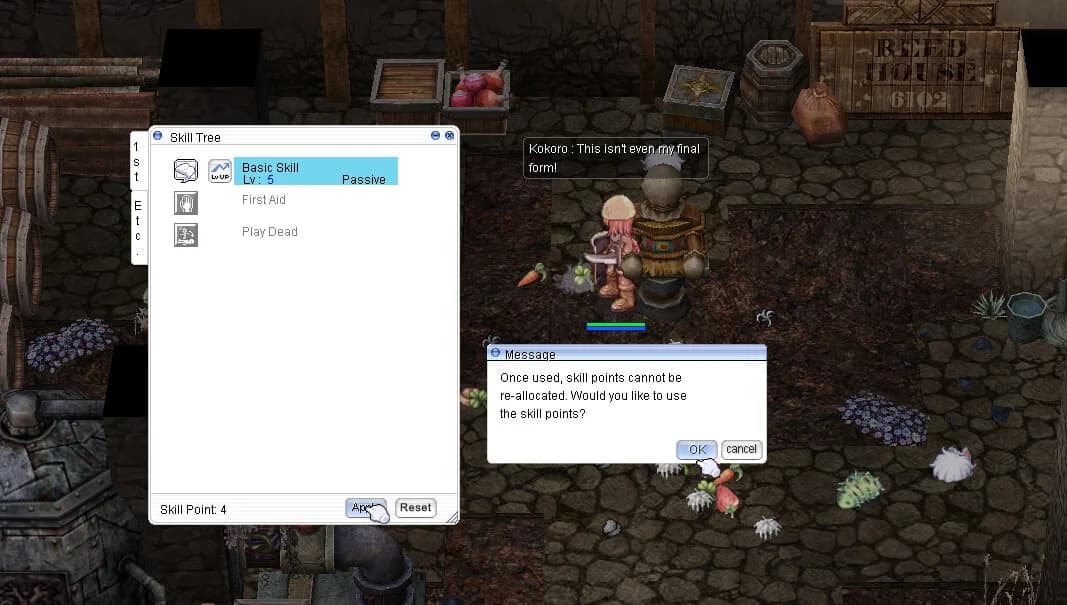
- Step 9. Continue killing Monsters: You will notice that you have gained now job levels and the world will now introduce you to Job Levels.
- Job Levels are points that can be added to skills to gain and level them.
- You can add your job points by opening the Skills Window (ALT+S), or click at the icon that appeared at the bottom left of your screen, and click on the arrow next to the skill you want to get or level up.
- When you're ready to confirm the addition, click apply.
- Step 10. Return to the Kitchen: Once you're done with your skills, return upstairs, to the kitchen, and speak to Mom. She will thank you for what you've done and welcome you to a conversation while you /sit and listen to her words.
- The world will now introduce you to the /sit command.
- You can press Insert or type /sit in the chat to sit you character.
- While sitting, your HP & SP regen will increase twice faster than opposed to sanding up.
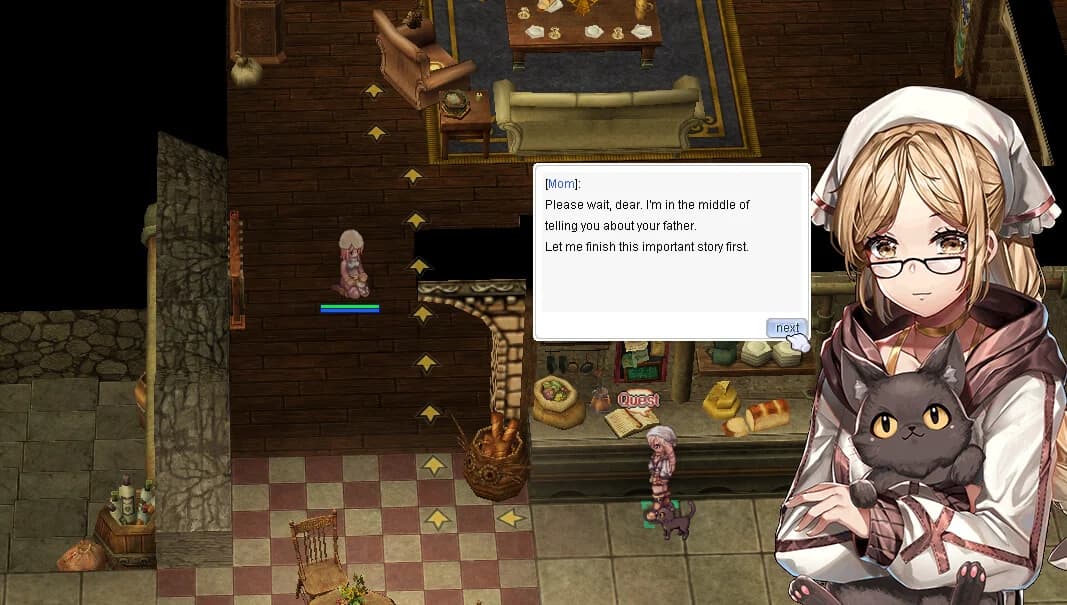
- Step 11. Pick out a Weapons Manual: Mom will now talk about your father. About his past as a Weapons Instructor and how his collection of training weapons and notes are still at the basement. She wants you to pick one before you set out but before that she will give you pocket money for some future supplies.
- Follow the arrows and go to the basement.
- At the marked place, pick a weapon from the Weapon's Manual.
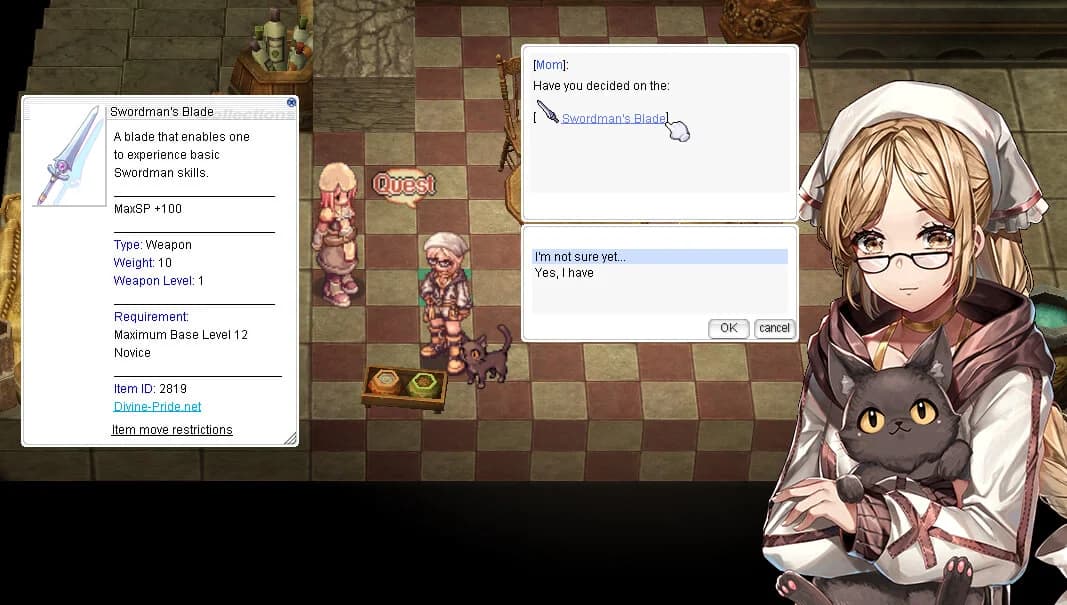
- The manual lets you preview the first-class path you may want to take by choosing a training weapon: Swordman's Blade, Thief's Dagger, Acolyte's Mace, Archer's Bow, Mage's Staff, Merchant's Axe, Ninja's Shuriken, Taekwon's Book, or Gunslinger's Revolver.
- Archer and Gunslinger choices also provide starter ammunition so you can test the weapon properly.
- Don't worry, no choice is final here. Taking a new manual replaces your current one, and you can test each option on the Training Dummy to your left before confirming your path with Mom.

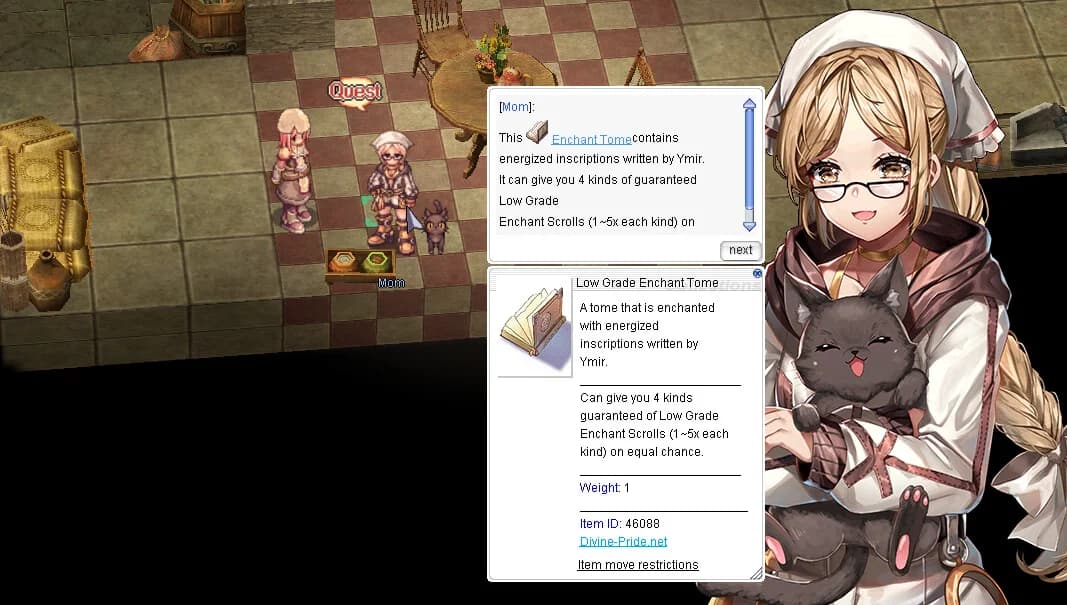
- Step 12. Confirm Weapon Choice with Mom: After picking the weapon of the class you want to advance, go upstairs and talk to Mom. She will ask you again if that's your final decision or not. If you're happy with your decision, choose: "Yes, I have!". Mom will then share a story about your father and a distant realm called 'Age of Ymir', inspired by the great adventures of Path of Exile - a world where warriors could enhance their equipment with powerful enchantments. She will give you an Enchant Tome that your father left for you.
- The Enchant Tome contains energized inscriptions written by Ymir. When used, it can give you 4 kinds of guaranteed Low Grade Enchant Scrolls (1~5x each kind) on equal chance. These enchantments will help you improve your equipment on your journey ahead. After receiving the Enchant Tome, Mom will congratulate you on your decision and mark the way toward the south exit. Before the Job Master portal opens, you will meet the Black Shadow Figure there and decide whether to accept Shorty's guidance.
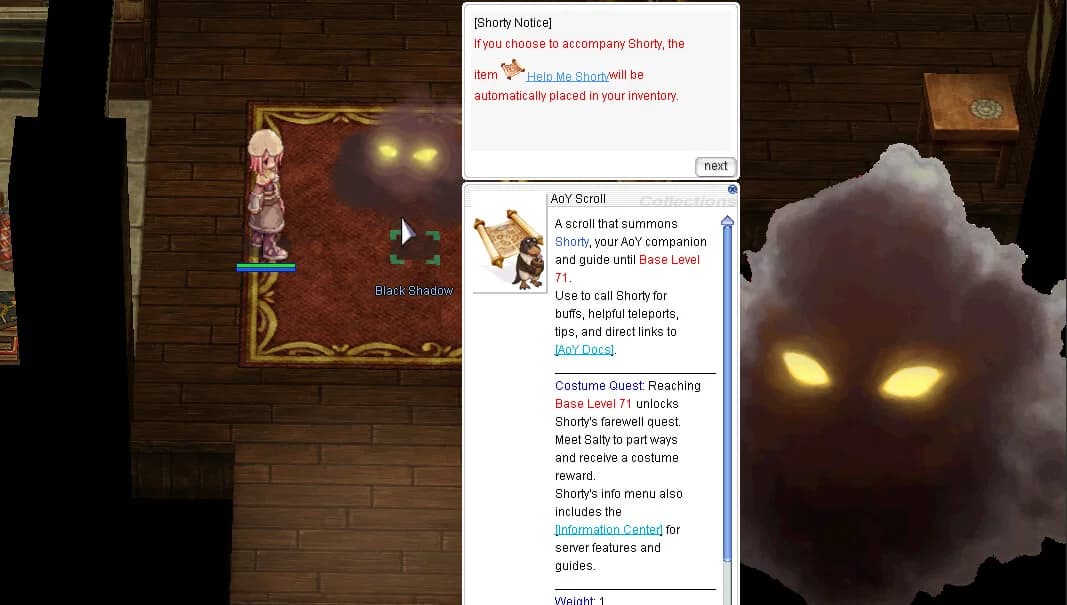
- Step 13. Meet the Black Shadow Figure (Shorty): At the south exit portal, there lies a shadowy figure with a quest sign. This is an important NPC (Shorty disguised as a Shadow Figure), to talk to as soon as you've completed Mom's final task around the house. Shorty is a dynamic NPC designed to accompany new players on Age of Ymir up to level 71, providing useful in-game information, buffs, and guidance. Accepting Shorty's help places the
- Step 14. Job Changing to 1st Class: After accepting Shorty's guidance, use the Job Master portal near the south exit to complete the tutorial and arrive in Aurelia. Follow the arrows to the right (south exit) and enter the Main Office, the Hub of Age of Ymir. Talk to the Job Master and he will detect that you have a Training Weapon with you.
- The Job Master is an NPC that exists here to help players that don't want to waste their time doing the quests to change classes/job He will question if you want to continue your journey as the job related to the weapon you picked (there is no turning back after this). If you decide that you now wish to be something different, simply say it and don't be shy, he will understand it. During the conversation you will also notice that you have received a neat Ring of Experience and Beginner Mark [1].
- The Ring of Experience and Beginner Mark [1] are temporary items that when equipped provides you extra experience from monsters that you kill while you're below level 100. The world will now congratulate you for changing class and the Eden Group will announce that they're recruiting new members. The NPC doing that should be at the right of the Job Master.

 Advancing Your Job
![]() Job Master Rewards
Job Master Rewards
Visit the Job Master in the Main Office to advance your class. Upon confirmation, you'll receive valuable starter items to boost your progression.
| Item | Effect | Notes |
|---|---|---|
| +1% EXP and Item Drop Rate | Temporary item (below level 100) | |
| +1% EXP from Brute monsters | Temporary item (below level 100) |
Quick Access: Use the command (
@main) to warp to the Main Office directly where the Job Master is located.
 Joining the Eden Group
Eden Group Headquarters
To visit the ![]() Eden Group Headquarters, simply locate an Eden Teleport Officer. Alternatively, you may use the command (
Eden Group Headquarters, simply locate an Eden Teleport Officer. Alternatively, you may use the command (@goeden) to warp to the headquarters directly!
moc_para01 27, 35) to register and select "Join the Eden Group." You can type anything as she will not actually check your spelling. She will give you the following starter items:

| Item | Quantity | Description |
|---|---|---|
| 15 | Provides Blessing buff (ATK +10%) | |
| 15 | Provides Increase Agility buff (AGI +10) | |
| 5 | Teleportation item for quick travel | |
| 1 | Access item for Eden Group services and quests |
 Choosing Your Path
- During all points of the tutorial, you may choose to warp to important locations via any of the beginner portals and or Age of Ymir airship.
- You are encouraged to complete the Training Grounds tutorial which afterwards leads to the Criatura Academy north of Izlude, the satellite city.
- Explore
 Weapon Manuals in the Criatura Academy to try class-specific training weapons. Each weapon temporarily transforms you into the related class with sample skills. Test different options and finalize your decision with respective instructors inside of the academy.
 Your First Instance


Beginner's Pulse Rift
A beginner-friendly Pulse Rift designed to fast-track early character progression with approachable mechanics and generous rewards.
- After completing the tutorial, it is recommended that you have your first adventure in an instance called
Poring Village! - After completing the Novice Tutorial, Mom sends a Rodex mail with a Poring Village Rift Capsule (opens in a new tab) (item ID 46316). This capsule is required to enter the Poring Village Rift.
- Farming at Poring Village instance rewards players with
 Festival Coins reedemable via the Festival Manager!
 - When you are ready to leave the tutorial path, use the Adventure Guide to find your next monster, quest, dungeon, equipment goal, or navigation route.
- Congratulations! You're now equipped with the basics and ready to explore the world of AoY.
 Shorty: The AoY Guide
Shorty is a dynamic NPC designed to accompany new players on Age of Ymir up to level 71, providing useful in-game information, buffs, and guidance.
- Shadow Figure: At the south exit portal, there lies a shadowy figure with a quest sign. This is an important NPC (Shorty disguised as a Shadow Figure), to talk to as soon as you've completed Mom's tasks around the house.

 Features of Shorty
Shorty's Services
Shorty is your personal guide up to level 71, providing essential buffs, guidance, and navigation assistance throughout your early journey.
| Feature | Description |
|---|---|
| Buffs | Shorty offers 40-minute buffs including:
|
| Guidance | Learn essential gameplay mechanics, such as stats, skills, and navigation tips. |
| Interactive Help | Summon Shorty anytime using the |
 Beginner Costume Quest
 Important Notice
Completing the Beginner Costume Quest will end Shorty's guidance. After this quest, Shorty will permanently depart and no longer assist you in the Age of Ymir. Be sure you're ready to proceed before finalizing the quest!
Quest Details
Level Requirement: At level 71, players can take Shorty to Payon's Inn to meet Salty and complete a quest.
Rewards: Upon quest completion, players receive the ![]() Galapago Cap Costume (opens in a new tab) and EXP rewards.
Galapago Cap Costume (opens in a new tab) and EXP rewards.
 Important Note
Shorty will depart permanently after reaching level 71 through the Salty quest, or earlier if you select the Break Up option.
 AoY Care Box
The ![]() AoY Care Box (opens in a new tab) system ensures players are well-supported every step of their journey. Boxes are awarded every 5 levels starting from level 5 to 95, providing a total of 19 boxes. These contain progressively better rewards, all of which are character-bound, ensuring fairness and progression integrity.
AoY Care Box (opens in a new tab) system ensures players are well-supported every step of their journey. Boxes are awarded every 5 levels starting from level 5 to 95, providing a total of 19 boxes. These contain progressively better rewards, all of which are character-bound, ensuring fairness and progression integrity.
 Available Items
| Item | Description |
|---|---|
| Restores SP for beginners | |
| Basic healing item | |
| Allows instant teleportation | |
| Identifies unidentified items | |
| Boosts attack speed | |
| Further increases attack speed | |
| Grants the highest attack speed boost | |
| Contains 20 potions each (Red, Orange, Yellow, or White) |
 Rewards Table
| Level | Blue Potion | Milk | Fly Wing | Magnifier | Con. Potion | Awk. Potion | Berserk Potion | Orange Box | Yellow Box | White Box |
|---|---|---|---|---|---|---|---|---|---|---|
| 5 | 10 | 20 | 50 | 15 | 1 | - | - | - | - | - |
| 10 | 15 | 40 | 100 | 15 | 1 | - | - | - | - | - |
| 15 | 20 | 60 | 150 | 10 | 2 | - | - | - | - | - |
| 20 | 15 | 80 | 200 | 10 | 2 | - | - | - | - | - |
| 25 | 20 | 100 | 250 | 5 | 3 | - | - | - | - | - |
| 30 | 25 | 120 | 300 | 5 | 3 | - | - | - | - | - |
| 35 | - | - | 300 | - | 3 | 2 | 1 | - | - | - |
| 40 | - | - | 300 | - | 2 | 2 | 1 | - | - | - |
| 45 | - | - | 300 | - | 2 | 3 | 1 | - | - | - |
| 95 | 45 | - | 300 | - | - | - | - | 20 | 20 | 20 |
Important Notes
Box Contents
Each ![]() Event Potion Box contains 20 potions of the respective type:
Event Potion Box contains 20 potions of the respective type:
 Red Potion - Basic healing
 Orange Potion - Moderate healing
 Yellow Potion - Strong healing
 White Potion - Maximum healing
All items received from AoY Care Boxes are bound to the character and cannot be traded or dropped. This ensures both old and new players receive progressively better rewards and helpful resources at each milestone level!